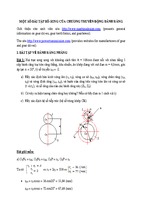
Mô tả:
Unigraphics NX8 - Associative Copy
[NX8-HELP] ASSOCIACTIVE COPY
1
Associative Copy
View a topic
Pattern Feature
Mirror Body
Extract Body
Instance Geometry
Composite Curve
Promote Body
Mirror Feature
Instance Feature
1. Pattern Feature
Use the Pattern Feature command to create patterns of features (linear, circular, polygon, etc.) with
various options for defining pattern boundaries, orientation of instances, clocking and variance.
You can create pattern features using a variety of pattern layouts.
Linear
Polygon
Along
Circular
Spiral
General
Reference
You can fill a specified boundary with a pattern feature.
For a Linear layout, you can specify a Symmetric pattern in one or both directions. You can also
specify to Stagger columns or rows.
Associactive Copy
drive24ward (meslab.org/mes)
[NX8-HELP] ASSOCIACTIVE COPY
2
For a Circular or Polygon layout, you can choose to radiate a pattern.
You can define a Pattern Increment by using expressions to specify pattern parameters.
You can export pattern parameter values to a spreadsheet and make positional edits that are
propagated back to your pattern definition.
You can explicitly select individual instance points for clocking, suppression and variance of
pattern features.
You can control the orientation of a pattern.
Orientation same as input Orientation follows pattern (circular)
You can choose between Simple and Variational pattern methods.
Associactive Copy
drive24ward (meslab.org/mes)
[NX8-HELP] ASSOCIACTIVE COPY
3
Where do I find it?
Application
Modeling and Shape Studio
Prerequisite
History mode
Toolbar
Feature→Pattern Feature
Menu
Insert→Associative Copy→Pattern Feature
1.1.
Pattern Feature methods
Simple
Simple design features such as holes and extruded features are
supported.
One input feature per output pattern.
Multi-body features are supported.
Variational
Associactive Copy
All features which support copy-paste are supported.
Detailed features such as blends and drafts are supported.
Each instance of the pattern is fully evaluated.
Works with multiple input features.
Multi-body features are supported.
You can reuse references to the input feature and control which
references from the input features are evaluated at each instance
location.
Advanced hole functions are supported.
Sketch features are supported.
drive24ward (meslab.org/mes)
[NX8-HELP] ASSOCIACTIVE COPY
4
1.2. Create a linear pattern of features in two
directions
This example shows you how to create a linear pattern of
features in two directions.
1.
Click Pattern Feature
.
2.
Select features to pattern.
3.
In the Pattern Definition group, from the
Layout list, select Linear
.
4.
Select an edge to define Direction 1.
Associactive Copy
drive24ward (meslab.org/mes)
[NX8-HELP] ASSOCIACTIVE COPY
5.
5
In the Direction 1 section:
From the Spacing list, choose Count
and Span.
In the Count box, type 5.
In the Span Distance box, type 145.
6.
In the Direction 2 section, select the Use
Direction 2 check box.
7.
Use Specify Vector to define Direction 2.
8.
In the Direction 2 section:
From the Spacing list, choose Count
and Pitch.
In the Count box, type 3.
In the Pitch Distance box, type 55.
9.
Choose another command or click OK to
create the pattern.
Associactive Copy
drive24ward (meslab.org/mes)
[NX8-HELP] ASSOCIACTIVE COPY
1.3.
6
Create a circular pattern of concentric features
This example shows you how to create a partial circular
pattern of features that are concentric.
1.
Click Pattern Feature
.
2.
Select the features to pattern.
3.
In the Pattern Definition group, from the Layout list,
select Circular
Associactive Copy
.
drive24ward (meslab.org/mes)
[NX8-HELP] ASSOCIACTIVE COPY
7
4.
Under Rotation Axis, click Specify Vector.
5.
Specify a vector of rotation.
6.
Specify a point of rotation.
7.
Under Angular Direction:
Associactive Copy
From the Spacing list, choose Pitch and Span.
From the Define Pitch As list, choose Angle.
In the Pitch Angle box, type 30.
In the Span Angle box, type 270.
drive24ward (meslab.org/mes)
[NX8-HELP] ASSOCIACTIVE COPY
8.
8
Under Radiate:
Select the Create Concentric Members check
box.
Make sure the Include First Circle check box
is selected.
From the Spacing list, choose Pitch and Span.
In the Pitch Distance box, type – 20.
In the Span Distance box, type – 50.
9.
Choose another command or click OK to create the
pattern.
Associactive Copy
drive24ward (meslab.org/mes)
[NX8-HELP] ASSOCIACTIVE COPY
1.4.
9
Create a pattern of features on a truncated cone
This example shows you how to:
Create an angled linear pattern of features on the
truncated cone face.
Use the first linear pattern to create another pattern
along a circular edge.
1.
Click Pattern Feature
.
2.
Select features to pattern.
You can use the Part Navigator
select features.
to
Feature groups can also be selected.
3.
Set the following Pattern Definition
parameters:
Associactive Copy
Layout = Linear
Specify Vector = Angled sketch line
Spacing = Count and Span
Count = 4
Span Distance = 70
drive24ward (meslab.org/mes)
[NX8-HELP] ASSOCIACTIVE COPY
4.
10
Click the middle mouse button to Apply.
5.
Select features to pattern.
You can use the Part Navigator
select features.
6.
Set the following Pattern Definition
parameters:
Associactive Copy
to
Layout = Along
Select Path = Edge of base of cone
Spacing = Count and Span
Count = 10
Location = %Arc Length
drive24ward (meslab.org/mes)
[NX8-HELP] ASSOCIACTIVE COPY
11
% Span By = 100
7.
Choose another command or click OK to
create the pattern.
1.5. Edit a pattern of features using variance and
clocking
This example shows you how to:
Vary a pattern by editing
parameters of selected features of
the pattern.
Use clocking to move specific
features of a feature pattern.
Associactive Copy
drive24ward (meslab.org/mes)
[NX8-HELP] ASSOCIACTIVE COPY
12
1.
In the Part Navigator, position the cursor over a
Pattern node to edit and right-click→Edit with
Rollback.
2.
In the Pattern Feature dialog box, in the Instance
Points section, click Select Instance Point
Associactive Copy
drive24ward (meslab.org/mes)
.
[NX8-HELP] ASSOCIACTIVE COPY
13
3.
Select the middle concentric arc of instance points as
the features to edit.
4.
With the cursor on a selected pattern point, rightclick→Specify Variance.
The Variance dialog box becomes available.
5.
Select an object expression to variant, then rightclick→Add to Edit.
The selected expression is added to the Values group
of the Variance dialog box where its value can be
modified for the selected instance points.
6.
You can edit multiple expressions by adding them to
the Values group.
Edit the expressions then OK. In this example the
following expressions were modified:
Associactive Copy
EXTRUDE: End Limit: Increased from 10
mm. to 30 mm.
SIMPLE HOLE: Diameter. Decreased from
10 mm. to 5 mm.
drive24ward (meslab.org/mes)
[NX8-HELP] ASSOCIACTIVE COPY
14
Visual check with Show Result
7.
Click OK.
8.
Click Deselect All
on the Selection bar.
The selected instance points are deselected.
9.
Select the new reference points, use Specify Variance
to vary the diameter.
10.
Make modifications to expressions. In this example,
the following expression was modified:
SIMPLE HOLE: Diameter. Decreased from
10 mm. to 5 mm.
Click OK.
Associactive Copy
drive24ward (meslab.org/mes)
[NX8-HELP] ASSOCIACTIVE COPY
15
Visual check with Show Result
11.
With the cursor over one of the selected instance
points, right-click→Clock.
12.
Use the Angle and Radial handles or input boxes to
adjust the clocking. In this example, the rotation angle
is set to 150 degrees.
13.
Click OK to accept the clocking parameters.
Associactive Copy
drive24ward (meslab.org/mes)
[NX8-HELP] ASSOCIACTIVE COPY
16
14.
Choose another command or click OK to create the
patter
1.6. Reuse pattern references to control the shape of
pattern features
This example shows you how to:
Create a pattern of slot features along a curve.
Reuse sketch references to control the shape of the pattern
features.
The feature pattern will be created from an extruded sketch.
The sketch is constrained to the base of the cylinder (1) and the
intersection curve on the tube (2).
Associactive Copy
drive24ward (meslab.org/mes)
[NX8-HELP] ASSOCIACTIVE COPY
17
1.
Click Pattern Feature
.
2.
Select features to pattern.
The default Reference Point is displayed. It is at the center of
the object’s mass.
3.
In the Reference Point group, use Specify Point options to
move the reference point to the tangency point on the
intersection curve.
4.
Set the following parameters for Direction 1:
Associactive Copy
Layout = Along
Path Method = Offset
Select Path = Angled elliptical intersection curve
Spacing = Count and Span
Count = 20
drive24ward (meslab.org/mes)
[NX8-HELP] ASSOCIACTIVE COPY
18
5.
Set the following parameters for Orientation:
6.
Location = % Arc Length
% Span By = 100
Orientation = Same as Input
Follow Face (selected)
Select Face = Outside face of the tube
Set the following parameters for Pattern Method:
Method = Variational
In the Reusable References list, select the geometry
you want to reference during patterning.
In this example, two sketches which control the slot
geometry are selected.
Extrude
Coordinate system for Datum Coordinate
System for Extrude
Sketch External Reference for Extrude
Sketch External Reference for Extrude
7.
Use Preview → Show Result to check the pattern. Choose
another command or click OK to create the pattern.
Associactive Copy
drive24ward (meslab.org/mes)
[NX8-HELP] ASSOCIACTIVE COPY
1.7.
19
Pattern Feature dialog box
Features to Pattern
Lets you select one or more features to pattern.
Select
Feature
Reference Point
Lets you specify a location reference point for the input feature.
Specify Point
Pattern Definition
Sets the pattern layout. There are seven available layouts.
Linear – Defines a layout using one or two directions.
Circular – Defines a layout using a rotation axis and optional radial spacing
parameters.
Polygon – Defines a layout using an equilateral polygon and optional radial
spacing parameters.
Layout
Spiral – Defines a layout using a spiral path.
Along – Defines a layout that follows a continuous curve chain and optionally a
second curve chain or a vector.
General – Defines a layout using locations defined by one or more target points
or coordinate systems.
Reference – Defines a layout by using an existing pattern.
Boundary Definition
Not available when Layout is set to Along, General, or Reference.
Associactive Copy
drive24ward (meslab.org/mes)
[NX8-HELP] ASSOCIACTIVE COPY
20
None
Does not define boundaries. Patterns are not restricted to boundaries.
Face
Lets you select face edges, sheet edges, or region boundary curves to define the
pattern boundary.
Curve
Lets you select a set of curves, or create a sketch to define the pattern boundary.
Boundary
Exclude
Lets you select curves or create a sketch to define an area that is excluded from
patterning.
Apply Margin to Internal Boundaries
Available when Layout is set to Linear, Circular, Polygon or Spiral and Boundary is
set to Face or Curve.
Simplified
Boundary
Fill
Displays the Simplified Layout subgroup of options that you can use to fill the specified
boundary with instances. The available options depend on the Layout option that you
select. You do not need to input as much information to create the instances.
Linear
layout
Associactive Copy
Lets you form a grid for the simplified linear layout pattern, using the
Square, Triangle, or Diamond options on the Layout list. The
drive24ward (meslab.org/mes)
- Xem thêm -