Inspections are visual examinations and manual checks
to determine the condition of an aircraft or component.
An aircraft inspection can range from a casual walkaround to a detailed inspection involving complete
disassembly and the use of complex inspection aids.
An inspection system consists of several processes,
including reports made by mechanics or the pilot or
crew flying an aircraft and regularly scheduled inspections of an aircraft. An inspection system is designed
to maintain an aircraft in the best possible condition.
Thorough and repeated inspections must be considered
the backbone of a good maintenance program. Irregular and haphazard inspection will invariably result in
gradual and certain deterioration of an aircraft. The
time spent in repairing an abused aircraft often totals far
more than any time saved in hurrying through routine
inspections and maintenance.
It has been proven that regularly scheduled inspections
and preventive maintenance assure airworthiness.
Operating failures and malfunctions of equipment are
appreciably reduced if excessive wear or minor defects
are detected and corrected early. The importance of
inspections and the proper use of records concerning
these inspections cannot be overemphasized.
Airframe and engine inspections may range from
preflight inspections to detailed inspections. The time
intervals for the inspection periods vary with the models
of aircraft involved and the types of operations being
conducted. The airframe and engine manufacturer’s
instructions should be consulted when establishing
inspection intervals.
Aircraft may be inspected using flight hours as a basis
for scheduling, or on a calendar inspection system.
Under the calendar inspection system, the appropriate
inspection is performed on the expiration of a specified number of calendar weeks. The calendar inspection system is an efficient system from a maintenance
management standpoint. Scheduled replacement of
components with stated hourly operating limitations is
normally accomplished during the calendar inspection
falling nearest the hourly limitation.
In some instances, a flight hour limitation is established
to limit the number of hours that may be flown during
the calendar interval.
Aircraft operating under the flight hour system are
inspected when a specified number of flight hours are
accumulated. Components with stated hourly operating
limitations are normally replaced during the inspection
that falls nearest the hourly limitation.
Basic Inspection
Techniques/Practices
Before starting an inspection, be certain all plates,
access doors, fairings, and cowling have been opened
or removed and the structure cleaned. When opening
inspection plates and cowling and before cleaning the
area, take note of any oil or other evidence of fluid
leakage.
Preparation
In order to conduct a thorough inspection, a great
deal of paperwork and/or reference information must
be accessed and studied before actually proceeding
to the aircraft to conduct the inspection. The aircraft
logbooks must be reviewed to provide background
information and a maintenance history of the particular
aircraft. The appropriate checklist or checklists must
be utilized to ensure that no items will be forgotten or
overlooked during the inspection. Also, many additional publications must be available, either in hard
copy or in electronic format to assist in the inspections.
These additional publications may include information
provided by the aircraft and engine manufacturers,
appliance manufacturers, parts venders, and the Federal
Aviation Administration (FAA).
8-1
Aircraft Logs
“Aircraft logs,” as used in this handbook, is an inclusive term which applies to the aircraft logbook and all
supplemental records concerned with the aircraft. They
may come in a variety of formats. For a small aircraft,
the log may indeed be a small 5" × 8" logbook. For
larger aircraft, the logbooks are often larger, in the form
of a three-ring binder. Aircraft that have been in service
for a long time are likely to have several logbooks.
The aircraft logbook is the record in which all data concerning the aircraft is recorded. Information gathered
in this log is used to determine the aircraft condition,
date of inspections, time on airframe, engines and
propellers. It reflects a history of all significant events
occurring to the aircraft, its components, and accessories, and provides a place for indicating compliance
with FAA airworthiness directives or manufacturers’ service bulletins. The more comprehensive the
logbook, the easier it is to understand the aircraft’s
maintenance history.
When the inspections are completed, appropriate
entries must be made in the aircraft logbook certifying
that the aircraft is in an airworthy condition and may
be returned to service. When making logbook entries,
exercise special care to ensure that the entry can be
clearly understood by anyone having a need to read it
in the future. Also, if making a hand-written entry, use
good penmanship and write legibly. To some degree,
the organization, comprehensiveness, and appearance
of the aircraft logbooks have an impact on the value of
the aircraft. High quality logbooks can mean a higher
value for the aircraft.
Checklists
Always use a checklist when performing an inspection.
The checklist may be of your own design, one provided
by the manufacturer of the equipment being inspected,
or one obtained from some other source. The checklist
should include the following:
1. Fuselage and hull group.
a. Fabric and skin — for deterioration,
distortion, other evidence of failure, and
defective or insecure attachment of fittings.
b. Systems and components — for proper
installation, apparent defects, and satisfactory
operation.
c. Envelope gas bags, ballast tanks, and related
parts — for condition.
8-2
2. Cabin and cockpit group.
a. Generally — for cleanliness and loose
equipment that should be secured.
b. Seats and safety belts — for condition and
security.
c. Windows and windshields — for deterioration
and breakage.
d. Instruments — for condition, mounting,
marking, and (where practicable) for proper
operation.
e. Flight and engine controls — for proper
installation and operation.
f. Batteries — for proper installation and charge.
g. All systems — for proper installation, general
condition, apparent defects, and security of
attachment.
3. Engine and nacelle group.
a. Engine section — for visual evidence of
excessive oil, fuel, or hydraulic leaks, and
sources of such leaks.
b. Studs and nuts — for proper torquing and
obvious defects.
c. Internal engine — for cylinder compression
and for metal particles or foreign matter on
screens and sump drain plugs. If cylinder
compression is weak, check for improper
internal condition and improper internal
tolerances.
d. Engine mount — for cracks, looseness of
mounting, and looseness of engine to mount.
e. Flexible vibration dampeners — for condition
and deterioration.
f. Engine controls — for defects, proper travel,
and proper safetying.
g. Lines, hoses, and clamps — for leaks,
condition, and looseness.
h. Exhaust stacks — for cracks, defects, and
proper attachment.
i. Accessories — for apparent defects in security
of mounting.
j. All systems — for proper installation, general
condition defects, and secure attachment.
k. Cowling — for cracks and defects.
l. Ground runup and functional check — check
all powerplant controls and systems for
correct response, all instruments for proper
operation and indication.
4. Landing gear group.
a. All units — for condition and security of
attachment.
b. Shock absorbing devices — for proper oleo
fluid level.
c. Anti-icing devices — for proper operation and
obvious defects.
d. Control mechanisms — for proper operation,
secure mounting, and travel.
8. Communication and navigation group.
c. Linkage, trusses, and members — for undue or
excessive wear, fatigue, and distortion.
a. Radio and electronic equipment — for proper
installation and secure mounting.
d. Retracting and locking mechanism — for
proper operation.
b. Wiring and conduits — for proper routing,
secure mounting, and obvious defects.
e. Hydraulic lines — for leakage.
c. Bonding and shielding — for proper
installation and condition.
f. Electrical system — for chafing and proper
operation of switches.
g. Wheels — for cracks, defects, and condition of
bearings.
h. Tires — for wear and cuts.
i. Brakes — for proper adjustment.
j. Floats and skis — for security of attachment
and obvious defects.
5. Wing and center section.
a. All components — for condition and security.
b. Fabric and skin — for deterioration, distortion,
other evidence of failure, and security of
attachment.
c. Internal structure (spars, ribs compression
members) — for cracks, bends, and security.
d. Movable surfaces — for damage or obvious
defects, unsatisfactory fabric or skin
attachment and proper travel.
e. Control mechanism — for freedom of
movement, alignment, and security.
f. Control cables — for proper tension, fraying,
wear and proper routing through fairleads and
pulleys.
6. Empennage group.
a. Fixed surfaces — for damage or obvious
defects, loose fasteners, and security of
attachment.
b. Movable control surfaces — for damage or
obvious defects, loose fasteners, loose fabric,
or skin distortion.
c. Fabric or skin — for abrasion, tears, cuts or
defects, distortion, and deterioration.
7. Propeller group.
a. Propeller assembly — for cracks, nicks, bends,
and oil leakage.
b. Bolts — for proper torquing and safetying.
d. Antennas — for condition, secure mounting,
and proper operation.
9. Miscellaneous.
a. Emergency and first aid equipment — for
general condition and proper stowage.
b. Parachutes, life rafts, flares, and so forth —
inspect in accordance with the manufacturer’s
recommendations.
c. Autopilot system — for general condition,
security of attachment, and proper operation.
Publications
Aeronautical publications are the sources of information for guiding aviation mechanics in the operation
and maintenance of aircraft and related equipment.
The proper use of these publications will greatly aid
in the efficient operation and maintenance of all aircraft. These include manufacturers’ service bulletins,
manuals, and catalogs; FAA regulations; airworthiness
directives; advisory circulars; and aircraft, engine and
propeller specifications.
Manufacturers’ Service Bulletins/Instructions
Service bulletins or service instructions are two of several types of publications issued by airframe, engine,
and component manufacturers.
The bulletins may include: (1) purpose for issuing
the publication, (2) name of the applicable airframe,
engine, or component, (3) detailed instructions for
service, adjustment, modification or inspection, and
source of parts, if required and (4) estimated number
of manhours required to accomplish the job.
Maintenance Manual
The manufacturer’s aircraft maintenance manual
contains complete instructions for maintenance of all
systems and components installed in the aircraft. It
contains information for the mechanic who normally
8-3
works on components, assemblies, and systems while
they are installed in the aircraft, but not for the overhaul mechanic. A typical aircraft maintenance manual
contains:
• A description of the systems (i.e., electrical,
hydraulic, fuel, control)
• Lubrication instructions setting forth the frequency
and the lubricants and fluids which are to be used
in the various systems,
• Pressures and electrical loads applicable to the
various systems,
• Tolerances and adjustments necessary to proper
functioning of the airplane,
• Methods of leveling, raising, and towing,
• Methods of balancing control surfaces,
• Identification of primary and secondary structures,
• Frequency and extent of inspections necessary to
the proper operation of the airplane,
• Special repair methods applicable to the airplane,
• Special inspection techniques requiring x-ray,
ultrasonic, or magnetic particle inspection, and
• A list of special tools.
Overhaul Manual
The manufacturer’s overhaul manual contains brief
descriptive information and detailed step by step
instructions covering work normally performed on a
unit that has been removed from the aircraft. Simple,
inexpensive items, such as switches and relays on
which overhaul is uneconomical, are not covered in
the overhaul manual.
Structural Repair Manual
This manual contains the manufacturer’s information
and specific instructions for repairing primary and secondary structures. Typical skin, frame, rib, and stringer
repairs are covered in this manual. Also included are
material and fastener substitutions and special repair
techniques.
Illustrated Parts Catalog
This catalog presents component breakdowns of structure and equipment in disassembly sequence. Also
included are exploded views or cutaway illustrations
for all parts and equipment manufactured by the aircraft
manufacturer.
8-4
Code of Federal Regulations (CFRs)
The CFRs were established by law to provide for the
safe and orderly conduct of flight operations and to
prescribe airmen privileges and limitations. A knowledge of the CFRs is necessary during the performance
of maintenance, since all work done on aircraft must
comply with CFR provisions.
Airworthiness Directives
A primary safety function of the FAA is to require
correction of unsafe conditions found in an aircraft,
aircraft engine, propeller, or appliance when such conditions exist and are likely to exist or develop in other
products of the same design. The unsafe condition may
exist because of a design defect, maintenance, or other
causes. Title 14 of the Code of Federal Regulations
(14 CFR) part 39, Airworthiness Directives, defines
the authority and responsibility of the Administrator for requiring the necessary corrective action. The
Airworthiness Directives (ADs) are published to notify
aircraft owners and other interested persons of unsafe
conditions and to prescribe the conditions under which
the product may continue to be operated.
Airworthiness Directives are Federal Aviation Regulations and must be complied with unless specific
exemption is granted.
Airworthiness Directives may be divided into two
categories: (1) those of an emergency nature requiring
immediate compliance upon receipt and (2) those of a
less urgent nature requiring compliance within a relatively longer period of time. Also, ADs may be a onetime compliance item or a recurring item that requires
future inspection on an hourly basis (accrued flight time
since last compliance) or a calendar time basis.
The contents of ADs include the aircraft, engine, propeller, or appliance model and serial numbers affected.
Also included are the compliance time or period, a
description of the difficulty experienced, and the necessary corrective action.
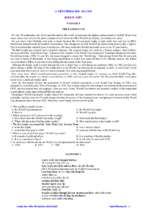
Type Certificate Data Sheets
The type certificate data sheet (TCDS) describes the
type design and sets forth the limitations prescribed
by the applicable CFR part. It also includes any other
limitations and information found necessary for type
certification of a particular model aircraft.
Type certificate data sheets are numbered in the upper
right-hand corner of each page. This number is the
same as the type certificate number. The name of the
type certificate holder, together with all of the approved
models, appears immediately below the type certificate
number. The issue date completes this group. This
information is contained within a bordered text box
to set it off.
The data sheet is separated into one or more sections.
Each section is identified by a Roman numeral followed
by the model designation of the aircraft to which the
section pertains. The category or categories in which
the aircraft can be certificated are shown in parentheses following the model number. Also included is the
approval date shown on the type certificate.
The data sheet contains information regarding:
1. Model designation of all engines for which the
aircraft manufacturer obtained approval for use
with this model aircraft.
2. Minimum fuel grade to be used.
3. Maximum continuous and takeoff ratings of the
approved engines, including manifold pressure
(when used), rpm, and horsepower (hp).
4. Name of the manufacturer and model designation for
each propeller for which the aircraft manufacturer
obtained approval will be shown together with
the propeller limits and any operating restrictions
peculiar to the propeller or propeller engine
combination.
5. Airspeed limits in both mph and knots.
6. Center of gravity range for the extreme loading
conditions of the aircraft is given in inches from
the datum. The range may also be stated in percent
of MAC (Mean Aerodynamic Chord) for transport
category aircraft.
7. Empty weight center of gravity (CG) range (when
established) will be given as fore and aft limits in
inches from the datum. If no range exists, the word
“none” will be shown following the heading on the
data sheet.
8. Location of the datum.
9. Means provided for leveling the aircraft.
10. All pertinent maximum weights.
11. Number of seats and their moment arms.
12. Oil and fuel capacity.
13. Control surface movements.
14. Required equipment.
15. Additional or special equipment found necessary
for certification.
16. Information concerning required placards.
It is not within the scope of this handbook to list all
the items that can be shown on the type certificate data
sheets. Those items listed above serve only to acquaint
aviation mechanics with the type of information generally included on the data sheets. Type certificate data
sheets may be many pages in length. Figure 8-1 shows
a typical TCDS.
When conducting a required or routine inspection, it is
necessary to ensure that the aircraft and all the major
items on it are as defined in the type certificate data
sheets. This is called a conformity check, and verifies
that the aircraft conforms to the specifications of the
aircraft as it was originally certified. Sometimes alterations are made that are not specified or authorized in the
TCDS. When that condition exists, a supplemental type
certificate (STC) will be issued. STCs are considered a
part of the permanent records of an aircraft, and should
be maintained as part of that aircraft’s logs.
Routine/Required Inspections
For the purpose of determining their overall condition,
14 CFR provides for the inspection of all civil aircraft
at specific intervals, depending generally upon the type
of operations in which they are engaged. The pilot in
command of a civil aircraft is responsible for determining whether that aircraft is in condition for safe flight.
Therefore, the aircraft must be inspected before each
flight. More detailed inspections must be conducted by
aviation maintenance technicians at least once each 12
calendar months, while inspection is required for others
after each 100 hours of flight. In other instances, an
aircraft may be inspected in accordance with a system
set up to provide for total inspection of the aircraft over
a calendar or flight time period.
To determine the specific inspection requirements
and rules for the performance of inspections, refer to
the CFR, which prescribes the requirements for the
inspection and maintenance of aircraft in various types
of operations.
Preflight/Postflight Inspections
Pilots are required to follow a checklist contained
within the Pilot’s Operating Handbook (POH) when
operating aircraft. The first section of a checklist
includes a section entitled Preflight Inspection. The
preflight inspection checklist includes a “walk-around”
section listing items that the pilot is to visually check
for general condition as he or she walks around the
airplane. Also, the pilot must ensure that fuel, oil and
other items required for flight are at the proper levels
(Continued on page 8-12)
8-5
Figure 8-1. Type certificate data sheet.
8-6
Figure 8-1. Type certificate data sheet. (continued)
8-7
Figure 8-1. Type certificate data sheet. (continued)
8-8
Figure 8-1. Type certificate data sheet. (continued)
8-9
Figure 8-1. Type certificate data sheet. (continued)
8-10
Figure 8-1. Type certificate data sheet. (continued)
8-11
and not contaminated. Additionally, it is the pilot’s
responsibility to review the airworthiness certificate,
maintenance records, and other required paperwork to
verify that the aircraft is indeed airworthy. After each
flight, it is recommended that the pilot or mechanic
conduct a postflight inspection to detect any problems
that might require repair or servicing before the next
flight.
Annual/100-Hour Inspections
Title 14 of the Code of Federal Regulations (14 CFR)
part 91 discusses the basic requirements for annual
and 100-hour inspections. With some exceptions, all
aircraft must have a complete inspection annually.
Aircraft that are used for commercial purposes and are
likely to be used more frequently than noncommercial
aircraft must have this complete inspection every 100
hours. The scope and detail of items to be included in
annual and 100-hour inspections is included as appendix D of 14 CFR part 43 and shown as Figure 8-2.
A properly written checklist, such as the one shown
earlier in this chapter, will include all the items of
appendix D. Although the scope and detail of annual
and 100-hour inspections is identical, there are two
significant differences. One difference involves persons
authorized to conduct them. A certified airframe and
powerplant maintenance technician can conduct a 100hour inspection, whereas an annual inspection must
be conducted by a certified airframe and powerplant
maintenance technician with inspection authorization
(IA). The other difference involves authorized overflight of the maximum 100 hours before inspection.
An aircraft may be flown up to 10 hours beyond the
100-hour limit if necessary to fly to a destination where
the inspection is to be conducted.
Progressive Inspections
Because the scope and detail of an annual inspection
is very extensive and could keep an aircraft out of
service for a considerable length of time, alternative
Appendix D to Part 43—Scope and Detail of Items (as Applicable to the Particular Aircraft)
To Be Included in Annual and 100-Hour Inspections
(a) Each person performing an annual or 100-hour
inspection shall, before that inspection, remove
or open all necessary inspection plates, access
doors, fairing, and cowling. He shall thoroughly
clean the aircraft and aircraft engine.
(3) Windows and windshields — for
deterioration and breakage.
(b) Each person performing an annual or 100-hour
inspection shall inspect (where applicable) the
following components of the fuselage and hull
group:
(5) Flight and engine controls — for improper
installation and improper operation.
(1) Fabric and skin — for deterioration,
distortion, other evidence of failure, and
defective or insecure attachment of fittings.
(2) Systems and components — for improper
installation, apparent defects, and
unsatisfactory operation.
(3) Envelope, gas bags, ballast tanks, and
related parts — for poor condition.
(c) Each person performing an annual or 100-hour
inspection shall inspect (where applicable) the
following components of the cabin and cockpit
group:
(1) Generally — for uncleanliness and loose
equipment that might foul the controls.
(2) Seats and safety belts — for poor condition
and apparent defects.
(4) Instruments — for poor condition,
mounting, marking, and (where practicable)
improper operation.
(6) Batteries — for improper installation and
improper charge.
(7) All systems — for improper installation,
poor general condition, apparent and
obvious defects, and insecurity of
attachment.
(d) Each person performing an annual or 100-hour
inspection shall inspect (where applicable)
components of the engine and nacelle group as
follows:
(1) Engine section — for visual evidence of
excessive oil, fuel, or hydraulic leaks, and
sources of such leaks.
(2) Studs and nuts — for improper torquing
and obvious defects.
(3) Internal engine — for cylinder compression
and for metal particles or foreign matter on
screens and sump drain plugs. If there is
Figure 8-2. Scope and detail of annual and 100-hour inspections.
8-12
Appendix D to Part 43—Scope and Detail of Items (as Applicable to the Particular Aircraft)
To Be Included in Annual and 100-Hour Inspections (continued)
weak cylinder compression, for improper
internal condition and improper internal
tolerances.
(4) Engine mount — for cracks, looseness
of mounting, and looseness of engine to
mount.
(5) Flexible vibration dampeners — for poor
condition and deterioration.
(6) Engine controls — for defects, improper
travel, and improper safetying.
(7) Lines, hoses, and clamps — for leaks,
improper condition, and looseness.
(8) Exhaust stacks — for cracks, defects, and
improper attachment.
(9) Accessories — for apparent defects in
security of mounting.
(10) All systems — for improper installation,
poor general condition, defects, and
insecure attachment.
(11) Cowling — for cracks and defects.
(e) Each person performing an annual or 100-hour
inspection shall inspect (where applicable)
the following components of the landing gear
group:
(1) All units — for poor condition and
insecurity of attachment.
(2) Shock absorbing devices — for improper
oleo fluid level.
(f) Each person performing an annual or 100-hour
inspection shall inspect (where applicable) all
components of the wing and center section
assembly for poor general condition, fabric or
skin deterioration, distortion, evidence of failure,
and insecurity of attachment.
(g) Each person performing an annual or 100-hour
inspection shall inspect (where applicable) all
components and systems that make up the complete empennage assembly for poor general
condition, fabric or skin deterioration, distortion,
evidence of failure, insecure attachment, improper
component installation, and improper component
operation.
(h) Each person performing an annual or 100-hour
inspection shall inspect (where applicable) the
following components of the propeller group:
(1) Propeller assembly — for cracks, nicks,
binds, and oil leakage.
(2) Bolts — for improper torquing and lack of
safetying.
(3) Anti-icing devices — for improper
operations and obvious defects.
(4) Control mechanisms — for improper
operation, insecure mounting, and restricted
travel.
(i) Each person performing an annual or 100-hour
inspection shall inspect (where applicable) the
following components of the radio group:
(3) Linkages, trusses, and members — for
undue or excessive wear fatigue, and
distortion.
(1) Radio and electronic equipment — for
improper installation and insecure
mounting.
(4) Retracting and locking mechanism — for
improper operation.
(2) Wiring and conduits — for improper
routing, insecure mounting, and obvious
defects.
(5) Hydraulic lines — for leakage.
(6) Electrical system — for chafing and
improper operation of switches.
(7) Wheels — for cracks, defects, and
condition of bearings.
(8) Tires — for wear and cuts.
(9) Brakes — for improper adjustment.
(10) Floats and skis — for insecure attachment
and obvious or apparent defects.
(3) Bonding and shielding — for improper
installation and poor condition.
(4) Antenna including trailing antenna — for
poor condition, insecure mounting, and
improper operation.
(j) Each person performing an annual or 100-hour
inspection shall inspect (where applicable) each
installed miscellaneous item that is not otherwise
covered by this listing for improper installation
and improper operation.
Figure 8-2. Scope and detail of annual and 100-hour inspections. (continued)
8-13
inspection programs designed to minimize down time
may be utilized. A progressive inspection program
allows an aircraft to be inspected progressively. The
scope and detail of an annual inspection is essentially
divided into segments or phases (typically four to
six). Completion of all the phases completes a cycle
that satisfies the requirements of an annual inspection.
The advantage of such a program is that any required
segment may be completed overnight and thus enable
the aircraft to fly daily without missing any revenue
earning potential. Progressive inspection programs
include routine items such as engine oil changes and
detailed items such as flight control cable inspection.
Routine items are accomplished each time the aircraft
comes in for a phase inspection and detailed items
focus on detailed inspection of specific areas. Detailed
inspections are typically done once each cycle. A cycle
must be completed within 12 months. If all required
phases are not completed within 12 months, the remaining phase inspections must be conducted before the
end of the 12th month from when the first phase was
completed.
Each registered owner or operator of an aircraft desiring
to use a progressive inspection program must submit
a written request to the FAA Flight Standards District
Office (FSDO) having jurisdiction over the area in
which the applicant is located. Title 14 of the Code
of Federal Regulations (14 CFR) part 91, §91.409(d)
§91.409 Inspections.
(d) Progressive inspection. Each registered owner or
operator of an aircraft desiring to use a progressive
inspection program must submit a written request
to the FAA Flight Standards district office having
jurisdiction over the area in which the applicant
is located, and shall provide —
(1) A certificated mechanic holding an
inspection authorization, a certificated
airframe repair station, or the manufacturer
of the aircraft to supervise or conduct the
progressive inspection;
(2) A current inspection procedures manual
available and readily understandable to pilot
and maintenance personnel containing, in
detail —
(i) An explanation of the progressive
inspection, including the continuity of
inspection responsibility, the making of
reports, and the keeping of records and
technical reference material;
(ii) An inspection schedule, specifying
the intervals in hours or days when
routine and detailed inspections will be
performed and including instructions
for exceeding an inspection interval by
not more than 10 hours while en route
and for changing an inspection interval
because of service experience;
(iii) Sample routine and detailed inspection
forms and instructions for their use; and
(iv) Sample reports and records and
instructions for their use;
(3) Enough housing and equipment for
necessary disassembly and proper inspection
of the aircraft; and
(4) Appropriate current technical information
for the aircraft.
The frequency and detail of the progressive inspection
shall provide for the complete inspection of the aircraft
within each 12 calendar months and be consistent
with the manufacturer's recommendations, field
service experience, and the kind of operation in which
the aircraft is engaged. The progressive inspection
schedule must ensure that the aircraft, at all times,
will be airworthy and will conform to all applicable
FAA aircraft specifications, type certificate data sheets,
airworthiness directives, and other approved data. If
the progressive inspection is discontinued, the owner
or operator shall immediately notify the local FAA
Flight Standards district office, in writing, of the
discontinuance. After the discontinuance, the first
annual inspection under §91.409(a)(1) is due within
12 calendar months after the last complete inspection
of the aircraft under the progressive inspection. The
100-hour inspection under §91.409(b) is due within
100 hours after that complete inspection. A complete
inspection of the aircraft, for the purpose of determining
when the annual and 100-hour inspections are due,
requires a detailed inspection of the aircraft and all
its components in accordance with the progressive
inspection. A routine inspection of the aircraft and
a detailed inspection of several components is not
considered to be a complete inspection.
Figure 8-3. 14 CFR §91.409(d) Progressive inspection.
8-14
establishes procedures to be followed for progressive
inspections and is shown in Figure 8-3.
Continuous Inspections
Continuous inspection programs are similar to progressive inspection programs, except that they apply
to large or turbine-powered aircraft and are therefore
more complicated.
Like progressive inspection programs, they require
approval by the FAA Administrator. The approval may
be sought based upon the type of operation and the
CFR parts under which the aircraft will be operated.
The maintenance program for commercially operated
aircraft must be detailed in the approved operations
specifications (OpSpecs) of the commercial certificate
holder.
Airlines utilize a continuous maintenance program
that includes both routine and detailed inspections.
However, the detailed inspections may include different levels of detail. Often referred to as “checks,” the
A-check, B-check, C-check, and D-checks involve
increasing levels of detail. A-checks are the least comprehensive and occur frequently. D-checks, on the other
hand, are extremely comprehensive, involving major
disassembly, removal, overhaul, and inspection of
systems and components. They might occur only three
to six times during the service life of an aircraft.
Altimeter and Transponder Inspections
Aircraft that are operated in controlled airspace under
instrument flight rules (IFR) must have each altimeter
and static system tested in accordance with procedures
described in 14 CFR part 43, appendix E, within the
preceding 24 calendar months. Aircraft having an air
traffic control (ATC) transponder must also have each
transponder checked within the preceding 24 months.
All these checks must be conducted by appropriately
certified individuals.
ATA iSpec 2200
In an effort to standardize the format for the way in
which maintenance information is presented in aircraft
maintenance manuals, the Air Transport Association
of America (ATA) issued specifications for Manufacturers Technical Data. The original specification was
called ATA Spec 100. Over the years, Spec 100 has
been continuously revised and updated. Eventually,
ATA Spec 2100 was developed for electronic documentation. These two specifications evolved into one
document called ATA iSpec 2200. As a result of this
standardization, maintenance technicians can always
find information regarding a particular system in
the same section of an aircraft maintenance manual,
regardless of manufacturer. For example, if you are
seeking information about the electrical system on
any aircraft, you will always find that information in
section (chapter) 24.
The ATA Specification 100 has the aircraft divided
into systems, such as air conditioning, which covers
the basic air conditioning system (ATA 21). Numbering in each major system provides an arrangement for
breaking the system down into several subsystems. Late
model aircraft, both over and under the 12,500 pound
designation, have their parts manuals and maintenance
manuals arranged according to the ATA coded system.
The following abbreviated table of ATA System, Subsystem, and Titles is included for familiarization purposes.
ATA Specification 100 Systems
Sys. Sub. Title
21 AIR CONDITIONING
21 00 General
21 10 Compression
21 20 Distribution
21 30 Pressurization Control
21 40 Heating
21 50 Cooling
21 60 Temperature Control
21 70 Moisture/Air Contaminate Control
The remainder of this list shows the systems and title
with subsystems deleted in the interest of brevity. Consult specific aircraft maintenance manuals for a complete description of the subsystems used in them.
22 AUTO FLIGHT
23 COMMUNICATIONS
24 ELECTRICAL POWER
25 EQUIPMENT/FURNISHINGS
26 FIRE PROTECTION
27 FLIGHT CONTROLS
28 FUEL
29 HYDRAULIC POWER
30 ICE AND RAIN PROTECTION
31 INDICATING/RECORDING SYSTEMS
32 LANDING GEAR
33 LIGHTS
34 NAVIGATION
8-15
35 OXYGEN
36 PNEUMATIC
37 VACUUM/PRESSURE
38 WATER/WASTE
39 ELECTRICAL/ELECTRONIC PANELS AND
MULTIPURPOSE COMPONENTS
49 AIRBORNE AUXILIARY POWER
51 STRUCTURES
52 DOORS
53 FUSELAGE
54 NACELLES/PYLONS
55 STABILIZERS
56 WINDOWS
57 WINGS
61 PROPELLERS
65 ROTORS
71 POWERPLANT
72 (T) TURBINE/TURBOPROP
72 (R) ENGINE RECIPROCATING
73 ENGINE FUEL AND CONTROL
74 IGNITION
75 BLEED AIR
76 ENGINE CONTROLS
77 ENGINE INDICATING
78 ENGINE EXHAUST
79 ENGINE OIL
80 STARTING
81 TURBINES (RECIPROCATING ENG)
82 WATER INJECTION
83 REMOTE GEAR BOXES (ENG DR)
Keep in mind that not all aircraft will have all these
systems installed. Small and simple aircraft have far
fewer systems than larger more complex aircraft.
Special Inspections
During the service life of an aircraft, occasions may
arise when something out of the ordinary care and
use of an aircraft might happen that could possibly
affect its airworthiness. When these situations are
encountered, special inspection procedures should
be followed to determine if damage to the aircraft
structure has occurred. The procedures outlined on the
following pages are general in nature and are intended
to acquaint the aviation mechanic with the areas which
8-16
should be inspected. As such, they are not all inclusive.
When performing any of these special inspections,
always follow the detailed procedures in the aircraft
maintenance manual. In situations where the manual
does not adequately address the situation, seek advice
from other maintenance technicians who are highly
experienced with them.
Hard or Overweight Landing Inspection
The structural stress induced by a landing depends not
only upon the gross weight at the time but also upon the
severity of impact. However, because of the difficulty
in estimating vertical velocity at the time of contact,
it is hard to judge whether or not a landing has been
sufficiently severe to cause structural damage. For this
reason, a special inspection should be performed after
a landing is made at a weight known to exceed the
design landing weight or after a rough landing, even
though the latter may have occurred when the aircraft did
not exceed the design landing weight.
Wrinkled wing skin is the most easily detected sign of
an excessive load having been imposed during a landing. Another indication which can be detected easily is
fuel leakage along riveted seams. Other possible locations of damage are spar webs, bulkheads, nacelle skin
and attachments, firewall skin, and wing and fuselage
stringers. If none of these areas show adverse effects,
it is reasonable to assume that no serious damage has
occurred. If damage is detected, a more extensive
inspection and alignment check may be necessary.
Severe Turbulence Inspection/Over “G”
When an aircraft encounters a gust condition, the
airload on the wings exceeds the normal wingload
supporting the aircraft weight. The gust tends to
accelerate the aircraft while its inertia acts to resist
this change. If the combination of gust velocity and
airspeed is too severe, the induced stress can cause
structural damage.
A special inspection should be performed after a flight
through severe turbulence. Emphasis should be placed
upon inspecting the upper and lower wing surfaces
for excessive buckles or wrinkles with permanent set.
Where wrinkles have occurred, remove a few rivets
and examine the rivet shanks to determine if the rivets
have sheared or were highly loaded in shear.
Through the inspection doors and other accessible
openings, inspect all spar webs from the fuselage to
the tip. Check for buckling, wrinkles, and sheared
attachments. Inspect for buckling in the area around
the nacelles and in the nacelle skin, particularly at the
wing leading edge.
Check for fuel leaks. Any sizeable fuel leak is an indication that an area may have received overloads which
have broken the sealant and opened the seams.
If the landing gear was lowered during a period of
severe turbulence, inspect the surrounding surfaces
carefully for loose rivets, cracks, or buckling. The
interior of the wheel well may give further indications
of excessive gust conditions. Inspect the top and bottom
fuselage skin. An excessive bending moment may have
left wrinkles of a diagonal nature in these areas.
Inspect the surface of the empennage for wrinkles,
buckling, or sheared attachments. Also, inspect the
area of attachment of the empennage to the fuselage.
The above inspections cover the critical areas. If excessive damage is noted in any of the areas mentioned,
the inspection should be continued until all damage
is detected.
Lightning Strike
Although lightning strikes to aircraft are extremely
rare, if a strike has occurred, the aircraft must be carefully inspected to determine the extent of any damage
that might have occurred. When lightning strikes
an aircraft, the electrical current must be conducted
through the structure and be allowed to discharge or
dissipate at controlled locations. These controlled
locations are primarily the aircraft’s static discharge
wicks, or on more sophisticated aircraft, null field dischargers. When surges of high voltage electricity pass
through good electrical conductors, such as aluminum
or steel, damage is likely to be minimal or nonexistent.
When surges of high voltage electricity pass through
non-metallic structures, such as a fiberglass radome,
engine cowl or fairing, glass or plastic window, or a
composite structure that does not have built-in electrical bonding, burning and more serious damage to the
structure could occur. Visual inspection of the structure
is required. Look for evidence of degradation, burning
or erosion of the composite resin at all affected structures, electrical bonding straps, static discharge wicks
and null field dischargers.
Fire Damage
Inspection of aircraft structures that have been subjected to fire or intense heat can be relatively simple
if visible damage is present. Visible damage requires
repair or replacement. If there is no visible damage,
the structural integrity of an aircraft may still have
been compromised. Since most structural metallic
components of an aircraft have undergone some sort
of heat treatment process during manufacture, an
exposure to high heat not encountered during normal
operations could severely degrade the design strength
of the structure. The strength and airworthiness of an
aluminum structure that passes a visual inspection but
is still suspect can be further determined by use of a
conductivity tester. This is a device that uses eddy current and is discussed later in this chapter. Since strength
of metals is related to hardness, possible damage to
steel structures might be determined by use of a hardness tester such as a Rockwell C hardness tester.
Flood Damage
Like aircraft damaged by fire, aircraft damaged by
water can range from minor to severe, depending
on the level of the flood water, whether it was fresh
or salt water and the elapsed time between the flood
occurrence and when repairs were initiated. Any parts
that were totally submerged should be completely
disassembled, thoroughly cleaned, dried and treated
with a corrosion inhibitor. Many parts might have
to be replaced, particularly interior carpeting, seats,
side panels, and instruments. Since water serves as an
electrolyte that promotes corrosion, all traces of water
and salt must be removed before the aircraft can again
be considered airworthy.
Seaplanes
Because they operate in an environment that accelerates corrosion, seaplanes must be carefully inspected
for corrosion and conditions that promote corrosion.
Inspect bilge areas for waste hydraulic fluids, water,
dirt, drill chips, and other debris. Additionally, since
seaplanes often encounter excessive stress from the
pounding of rough water at high speeds, inspect for
loose rivets and other fasteners; stretched, bent or
cracked skins; damage to the float attach fitting; and
general wear and tear on the entire structure.
Aerial Application Aircraft
Two primary factors that make inspecting these aircraft
different from other aircraft are the corrosive nature of
some of the chemicals used and the typical flight profile. Damaging effects of corrosion may be detected in
a much shorter period of time than normal use aircraft.
Chemicals may soften the fabric or loosen the fabric
tapes of fabric covered aircraft. Metal aircraft may need
to have the paint stripped, cleaned, and repainted and
corrosion treated annually. Leading edges of wings and
other areas may require protective coatings or tapes.
Hardware may require more frequent replacement.
8-17
During peak use, these aircraft may fly up to 50 cycles
(takeoffs and landings) or more in a day, most likely
from an unimproved or grass runway. This can greatly
accelerate the failure of normal fatigue items. Landing
gear and related items require frequent inspections.
Because these aircraft operate almost continuously at
very low altitudes, air filters tend to become obstructed
more rapidly.
Additional information on NDI may be found by
referring to chapter 5 of FAA Advisory Circular (AC)
43.13-1B, Acceptable Methods, Techniques, and Practices — Aircraft Inspection and Repair. Information
regarding training, qualifications, and certification of
NDI personnel may be found in FAA Advisory Circular
(AC) 65-31A, Training, Qualification and Certification
of Non-destructive Inspection (NDI) Personnel.
Special Flight Permits
General Techniques
Before conducting NDI, it is necessary to follow
preparatory steps in accordance with procedures specific to that type of inspection. Generally, the parts or
areas must be thoroughly cleaned. Some parts must
be removed from the aircraft or engine. Others might
need to have any paint or protective coating stripped. A
complete knowledge of the equipment and procedures
is essential and if required, calibration and inspection
of the equipment must be current.
For an aircraft that does not currently meet airworthiness requirements because of an overdue inspection,
damage, expired replacement times for time-limited
parts or other reasons, but is capable of safe flight,
a special flight permit may be issued. Special flight
permits, often referred to as ferry permits, are issued
for the following purposes:
• Flying the aircraft to a base where repairs,
alterations, or maintenance are to be performed,
or to a point of storage.
• Delivering or exporting the aircraft.
• Production flight testing new production
aircraft.
• Evacuating aircraft from areas of impending
danger.
• Conducting customer demonstration flights in
new production aircraft that have satisfactorily
completed production flight tests.
Additional information about special flight permits
may be found in 14 CFR part 21. Application forms for
special flight permits may be requested from the nearest
FAA Flight Standards District Office (FSDO).
Nondestructive Inspection/Testing
The preceding information in this chapter provided
general information regarding aircraft inspection. The
remainder of this chapter deals with several methods
often used on specific components or areas on an aircraft when carrying out the more specific inspections.
They are referred to as nondestructive inspection (NDI)
or nondestructive testing (NDT). The objective of
NDI and NDT is to determine the airworthiness of a
component without damaging it, which would render
it unairworthy. Some of these methods are simple,
requiring little additional expertise, while others are
highly sophisticated and require that the technician be
highly trained and specially certified.
8-18
Visual Inspection
Visual inspection can be enhanced by looking at the
suspect area with a bright light, a magnifying glass,
and a mirror (when required). Some defects might
be so obvious that further inspection methods are not
required. The lack of visible defects does not necessarily mean further inspection is unnecessary. Some
defects may lie beneath the surface or may be so small
that the human eye, even with the assistance of a magnifying glass, cannot detect them.
Borescope
Inspection by use of a borescope is essentially a visual
inspection. A borescope is a device that enables the
inspector to see inside areas that could not otherwise be
inspected without disassembly. An example of an area
that can be inspected with a borescope is the inside of
a reciprocating engine cylinder. The borescope can be
inserted into an open spark plug hole to detect damaged
pistons, cylinder walls, or valves. Another example
would be the hot section of a turbine engine to which
access could be gained through the hole of a removed
igniter or removed access plugs specifically installed
for inspection purposes.
Borescopes are available in two basic configurations.
The simpler of the two is a rigid type of small diameter
telescope with a tiny mirror at the end that enables the
user to see around corners. The other type uses fiber
optics that enables greater flexibility. Many borescopes
provide images that can be displayed on a computer or
video monitor for better interpretation of what is being
viewed and to record images for future reference. Most
borescopes also include a light to illuminate the area
being viewed.
Liquid Penetrant Inspection
Penetrant inspection is a nondestructive test for defects
open to the surface in parts made of any nonporous
material. It is used with equal success on such metals
as aluminum, magnesium, brass, copper, cast iron,
stainless steel, and titanium. It may also be used on
ceramics, plastics, molded rubber, and glass.
Penetrant inspection will detect such defects as surface
cracks or porosity. These defects may be caused by
fatigue cracks, shrinkage cracks, shrinkage porosity, cold shuts, grinding and heat treat cracks, seams,
forging laps, and bursts. Penetrant inspection will also
indicate a lack of bond between joined metals.
The main disadvantage of penetrant inspection is that
the defect must be open to the surface in order to let
the penetrant get into the defect. For this reason, if the
part in question is made of material which is magnetic,
the use of magnetic particle inspection is generally
recommended.
Penetrant inspection uses a penetrating liquid that
enters a surface opening and remains there, making
it clearly visible to the inspector. It calls for visual
examination of the part after it has been processed,
increasing the visibility of the defect so that it can
be detected. Visibility of the penetrating material is
increased by the addition of one of two types of dye,
visible or fluorescent.
The visible penetrant kit consists of dye penetrant,
dye remover emulsifier, and developer. The fluorescent penetrant inspection kit contains a black light
assembly, as well as spray cans of penetrant, cleaner,
and developer. The light assembly consists of a power
transformer, a flexible power cable, and a hand-held
lamp. Due to its size, the lamp may be used in almost
any position or location.
Briefly, the steps for performing a penetrant inspection are:
1. Thorough cleaning of the metal surface.
2. Applying penetrant.
3. Removing penetrant with remover emulsifier or
cleaner.
4. Drying the part.
5. Applying the developer.
6. Inspecting and interpreting results.
Interpretation of Results
The success and reliability of a penetrant inspection
depends upon the thoroughness with which the part
was prepared. Several basic principles applying to
penetrant inspection are:
1. The penetrant must enter the defect in order to form
an indication. It is important to allow sufficient
time so the penetrant can fill the defect. The defect
must be clean and free of contaminating materials
so that the penetrant is free to enter.
2. If all penetrant is washed out of a defect, an
indication cannot be formed. During the washing
or rinsing operation, prior to development, it is
possible that the penetrant will be removed from
within the defect, as well as from the surface.
3. Clean cracks are usually easy to detect. Surface
openings that are uncontaminated, regardless of
how fine, are seldom difficult to detect with the
penetrant inspection.
4. The smaller the defect, the longer the penetrating
time. Fine crack-like apertures require a longer
penetrating time than defects such as pores.
5. When the part to be inspected is made of a material
susceptible to magnetism, it should be inspected
by a magnetic particle inspection method if the
equipment is available.
6. Visible penetrant-type developer, when applied to
the surface of a part, will dry to a smooth, even,
white coating. As the developer dries, bright red
indications will appear where there are surface
defects. If no red indications appear, there are no
surface defects.
7. When conducting the fluorescent penetrant-type
inspection, the defects will show up (under black
light) as a brilliant yellow-green color and the
sound areas will appear deep blue-violet.
8. It is possible to examine an indication of a defect
and to determine its cause as well as its extent.
Such an appraisal can be made if something is
known about the manufacturing processes to which
the part has been subjected.
The size of the indication, or accumulation of penetrant, will show the extent of the defect and the brilliance will be a measure of its depth. Deep cracks will
hold more penetrant and will be broader and more brilliant. Very fine openings can hold only small amounts
of penetrants and will appear as fine lines. Figure 8-4
shows some of the types of defects that can be located
using dry penetrant.
8-19
Pits of porosity
Tight crack or partially welded lap
Crack or similar opening
Figure 8-4. Types of defects.
False Indications
With the penetrant inspection, there are no false indications in the sense that they occur in the magnetic
particle inspection. There are, however, two conditions which may create accumulations of penetrant
that are sometimes confused with true surface cracks
and discontinuities.
The first condition involves indications caused by poor
washing. If all the surface penetrant is not removed in
the washing or rinsing operation following the penetrant dwell time, the unremoved penetrant will be visible. Evidences of incomplete washing are usually easy
to identify since the penetrant is in broad areas rather
than in the sharp patterns found with true indications.
When accumulations of unwashed penetrant are found
on a part, the part should be completely reprocessed.
Degreasing is recommended for removal of all traces
of the penetrant.
False indications may also be created where parts
press fit to each other. If a wheel is press fit onto a
shaft, penetrant will show an indication at the fit line.
This is perfectly normal since the two parts are not
meant to be welded together. Indications of this type
are easy to identify since they are regular in form and
shape.
Eddy current is used in aircraft maintenance to inspect
jet engine turbine shafts and vanes, wing skins, wheels,
bolt holes, and spark plug bores for cracks, heat or
frame damage. Eddy current may also be used in repair
of aluminum aircraft damaged by fire or excessive heat.
Different meter readings will be seen when the same
metal is in different hardness states. Readings in the
affected area are compared with identical materials in
known unaffected areas for comparison. A difference
in readings indicates a difference in the hardness state
of the affected area. In aircraft manufacturing plants,
eddy current is used to inspect castings, stampings,
machine parts, forgings, and extrusions. Figure 8-5
shows a technician performing an eddy current inspection on an aluminum wheel half.
Basic Principles
When an alternating current is passed through a coil,
it develops a magnetic field around the coil, which in
turn induces a voltage of opposite polarity in the coil
and opposes the flow of original current. If this coil
is placed in such a way that the magnetic field passes
Eddy Current Inspection
Electromagnetic analysis is a term which describes the
broad spectrum of electronic test methods involving the
intersection of magnetic fields and circulatory currents.
The most widely used technique is the eddy current.
Eddy currents are composed of free electrons under the
influence of an induced electromagnetic field which
are made to “drift” through metal.
8-20
Figure 8-5. Eddy current inspection of wheel half.
- Xem thêm -