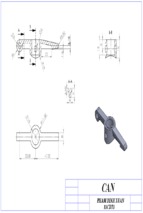
Mô tả:
Core and Cavity Design
Core and Cavity Design
Version 5 Release 11
Core and Cavity Design
Site Map
Preface
Using this Guide
What's New
Getting Started
Importing the Molded Part
Defining the Main Pulling Direction
Defining a Direction for the Slider
Transferring faces to the slider
Basic Tasks
Importing a Part
Defining the Main Pulling Direction
Pulling Direction for Sliders
Transferring Elements
Splitting a Face
Aggregating Surfaces
Sectioning
Surface Boundaries
Workbench Description
Menu Bar Description
Tool Bar Description
Annotations
Import Part
Pulling Direction
Parting Line
Parting Surface
Page 1
Core and Cavity Design
Wireframe
Operations
Advanced Replication Tools
Specifications Tree
Glossary
Index
Version 5 Release 11
Page 2
Version 5 Release 11
Core and Cavity Design
Page 3
Preface
Core and Cavity Design defines the core and cavity sides of a part, including any
sliders or loose cores that may be required, so as to produce a MoldedPart ready to be
used with Mold Tooling Design. It includes functions that define:
The pulling directions,
the parting line
the parting surface,
the splitting surface,
along with analysis and fine tuning capacities.
Using this Guide
Core and Cavity Design
Version 5 Release 11
Page 4
Using this Guide
Prior to reading the Mold Tooling Design user's guide, you are
recommended to have a look at the Infrastructure User's Guide for
information on the generic capabilities common to all products.
Version 5 Release 11
Core and Cavity Design
Page 5
What's New?
New Functionalities
Display functions
You can now choose to display the boundaries of surfaces by a click in the
associated icon.
Sectioning
Aggregate
Aggregates the surfaces contained by an OpenBody into one or several
surfaces.
Enhanced Functionalities
Defines pulling direction: several functionalities have been added to improve
productivity
The action generates no longer Joins, but Surfaces, visible in the specification
tree, resulting in higher performances in the action itself and in the actions
"Defines slider lifter direction", "Transfer an element" and "Split Mold Area". An
exploded view of the core and cavity areas is available. Faces can be
transferred from one area to another. Cast shadows can be taken into account
for a better definition of the areas. The definition of the core and the cavity areas
can be inverted. A Cancel button is available in the progress bar that indicates
the advancement of the computation.
Defines sliders pulling direction: several functionalities have been added to improve
productivity
The action generates no longer Joins, but Surfaces, visible in the specification
tree, resulting in higher performances in the action itself and in the actions
"Defines pulling direction", "Transfer an element"and "Split Mold Area". An
exploded view of the core and cavity areas is available. Faces can be
transferred from one area to another. The definition of the core and the cavity
areas can be inverted. A Cancel button is available in the progress bar that
indicates the advancement of the computation.
Transfer an element
The action removes the faces transferred from the initial surface and creates a
surface for all the faces transferred in the destination OpenBody. A progress bar
indicates the advancement of the transfer.
Core and Cavity Design
Version 5 Release 11
Split Mold Area
It generates splits computed in Datum mode.
Shape fillet
A tritangent fillet option as been added.
Page 6
Core and Cavity Design
Version 5 Release 11
Page 7
Getting Started
This is a short tutorial that will help guide you through the
key functionalities in the Core & Cavity workbench. You will
learn how to take a part and define its core, cavity and slider
surfaces.
The tutorial should not take you more than 15 minutes to
complete.
Importing the Molded Part
Defining the Main Pulling Direction
Defining a Direction for the Slider
Transferring faces to the slider
Core and Cavity Design
Version 5 Release 11
Page 8
Importing the Molded Part
This task shows you how to enter the Core & Cavity Design
workbench and how to import a part to use there.
Ensure that you have a product (and not a part) in the viewer.
1.Start the application with Start > Mechanical Design > Core &
Cavity Design.
2.Click the Import Model icon
and import
GettingStarted.CATPart from the samples directory.
Click the Affinity Shrinkage icon.
Core and Cavity Design
3.Press OK.
Version 5 Release 11
Page 9
Core and Cavity Design
Version 5 Release 11
Page 10
Defining the Main Pulling
Direction
This task teaches you how to define the main pulling direction
which, in turn, defines the core and cavity surfaces.
1.Click the Defines
pulling direction icon
.
2..Once the dialog box is open, click the part in the viewer.
Core and Cavity Design
Version 5 Release 11
Page 11
The surface that you see is green because it corresponds to
the cavity surface.
Turn the part over and you will see the core surface in red:
However, as you turn the part round you will notice that there
is an area that is neither red (core) nor green (cavity). This
area will require another pulling direction for the slider that will
be needed to ensure that the part can be correctly unmolded.
Core and Cavity Design
Version 5 Release 11
3.Press OK to create
the core and the
cavity sides.
You are now going to define the slider pulling direction.
Page 12
Core and Cavity Design
Page 13
Version 5 Release 11
Defining a Direction for the Slider
This task shows you how to define a pulling direction for a surface that
is a slider or a loose core.
1.Click the Defines slider lifter direction icon
.
2.Drag the compass
into the middle of the hole in the blue face so as to define the pulling
axis for the slider like this:
Core and Cavity Design
Version 5 Release 11
Page 14
You could also enter the coordinates for the direction in the dialog box
like this:
Core and Cavity Design
3.Click on the blue face.
The blue face turns green.
4.Press OK.
The face now turns yellow:
Version 5 Release 11
Page 15
Core and Cavity Design
Version 5 Release 11
We are now going to deal with the round hole in the part.
Page 16
Core and Cavity Design
Version 5 Release 11
Page 17
Transferring Faces to the Slider
You are now going to see how to transfer the faces on the
inside of the hole to the slider.
1.Expand the tree.
Hide the core, the cavity and the slider by selecting them, one
at a time, in the tree and using the Hide/Show option in the
contextual menu.
2.Click the Transfer Element icon
.
3.Choose Slider/Lifter.1 as the destination.
4.Select the faces that are displayed.
Core and Cavity Design
Version 5 Release 11
Page 18
5.Press OK. The selected faces are transferred to the
slider/lifter, and as the slider is hidden, the faces vanish from
the screen.
Core and Cavity Design
Version 5 Release 11
Basic Tasks
Importing a Part
Defining the Main Pulling Direction
Pulling Direction for Sliders
Transferring Elements
Splitting a Face
Aggregating Surfaces
Sectioning
Surface Boundaries
Page 19
Core and Cavity Design
Version 5 Release 11
Page 20
Importing a Part
This task shows you how to open the workbench and to
import a part. You can also use scaling and affinity functions
to take account of shrinkage.
There is also an explanation of the parameters in the dialog
box.
Ensure that you have a product (and not a part) in the
viewer.
1. Open the workbench via Start > Mechanical Design > Core
& Cavity Design.
- Xem thêm -