Mô tả:
bài tập hướng đẫn mô phỏng 3D trong inventor
Autodesk Inventor
Design Exercise 2:
F1 Team Challenge Car
Developed by Tim Varner – Synergis Technologies
© Tim Varner - 2004
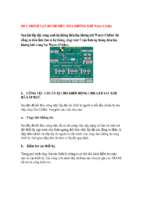
The Inventor User Interface
Command Panel
Standard
Toolbar
Lists the commands that
are currently available in
2D Sketch or Part features mode
Graphics Window
Displays your model
Model Browser
Records a history of
the operations you
have performed
Message Bar
Prompts the user
for input
(similar to the Command
Line in AutoCAD)
The Inventor User Interface
Dialog Boxes open when
Information needs to be
Input by the user
More about the User Interface
Left clicking on a down arrow
next to a command will open
a pull-down menu with additional
options
Slider bar – used for
scrolling up and down
Fly out tabs show the user the
command before selection
Using the Mouse
A click with the right
(R) mouse button
invokes “pop-up”
menus
The left (L) mouse
button selects
commands and objects
The Escape key
ends commands
The mouse wheel
Is used to
Zoom and Pan
Step 1. – Launch Autodesk Inventor by double (L) clicking the Inventor Icon on the Windows desktop.
Step 2. – (L) click on Open. Your Instructor will tell you which directory to “Look in”. (L) click on the directory
then (L) click on the file F1Blank.ipt. (L) click on Open.
Step 3. – (L) click on the Rotate button in the Standard Toolbar and a “free rotate target” will appear on the
screen. Move the cursor inside the target, press and hold the left mouse button while moving the mouse.
Notice how the view rotates. Next, move the cursor just outside the target; press and hold the left mouse
button while moving the mouse. Notice how the view rotates.
Step 3
Rotate button
Free Rotate
target
Step 4. – Practice with the Free Rotate command until you feel comfortable using it. Now move the cursor
inside the Free Rotate target and single (R) click to open the dialog box shown below. Select the Common
View [SPACE] option. NOTE: that pressing the Space Bar on the keyboard will toggle between the Free
Rotate target and the Common View box.
Step 4
Step 5. – When the Common View command is selected, the Free Rotate target disappears and the
Common View box is displayed. The green arrows indicate the direction from which your model will be
viewed. As you move the cursor over the green arrows with the mouse they highlight. When the arrows are
highlighted and selected with a (L) click, the view changes according to the direction the selected arrow was
pointing. Practice with the Common View rotation command until you feel comfortable using it.
Step 5
Common View box
Step 6. – Using a combination of Free Rotate and Common View, Rotate the F1 Blank until you are
looking directly at the TOP surface (as shown below) with the hole for the CO2 cartridge to the left. Check to
be sure the hole is to the left by toggling the display between Shaded Display and Wireframe Display with
the Shaded Display icons.
Step 6
Shaded Display icons
Step 7. – Move the cursor over the outline of the car blank and (R) click. The outline of the blank will turn
blue and a pop-up dialog box opens. (L) click on New Sketch.
Step 7
open a New Sketch
Step 8. – Notice that a grid appears over the Graphics Window and the Command Panel changes from the
Part Features Panel to the 2D Sketch Panel. You are now ready to begin sketching the top profile of your
F1 car design.
Step 8
2D Sketch Panel
NOTE: – When sketching with the Line command, a (L) click will start a line (point 1 below); move the
mouse and (L) click again to locate the end point of a line (point 2 below). To draw arcs while in the Line
command, (L) click and hold the mouse button down (point 2 below) and move the mouse to trace an arc.
When you have traced the desired arc, release the left mouse button (point 3 below). When finished with the
line command, (R) click and select Done from the pop-up menu.
Line command
3
1
2
Design Alternative: – You can also sketch with splines. Splines are free-formed curves. To use the Spline
command, (L) click on the down arrow beside the Line command then (L) click on Spline. When you have
placed the last point of the spline, (R) click and select Continue from the pop-up menu with a (L) click.
Practice with the Line and Spline commands before going to the next step.
Spline command
Spline
3
1
2
4
5
6
7
8
9
Sketching hint: When sketching, be sure that the shape you are sketching forms a closed profile. If there
are open profiles or self intersecting profiles in your sketch, they will not extrude! These conditions can
be corrected by using the Extend command and/or the Trim command.
Sketching hints:
These conditions must be corrected before continuing.
Open profile
Self intersecting profile
Correct these conditions with the Extend or Trim commands
Extend
Trim
Close by using the
Extend command
Close by using the
Trim command
Step 9. - From the 2D Sketch Panel, select the Line command with a single (L) click. Draw the rough
sketch shown below. Notice that the cursor turns to a yellow dot, and as you move the dot along the outline
of the sketch, it will turn green at the end points and mid-points of the lines. Once a mid-point or end point
has been found, construction lines will project from the yellow dot as you move the cursor horizontally or
vertically. Don’t worry about exact dimensions. When placing your points, follow the order below and be sure
that your sketch forms a closed profile. REMEMBER - If the profile is not closed it will not extrude.
Step
Step
4 9
3
4
5
6
7
8 9
2
10
11
1
Step 10. – When your sketch is finished, (L) click on the black down arrow beside the Constraint command
and (L) click on Tangent. Apply tangent constraints between the lines and arcs of your sketch by first (L)
clicking on a line, then on the adjacent arc. This will insure that you have a smooth transition from the lines
to the arcs.
Step 10
Down arrow
Arc
Line
Step 11. – (L) click on the Mirror command. Select each of the lines in your sketch by (L) clicking on them
individually (holding the Shift key down will allow you to select multiple lines) or by windowing the sketch.
Note that as you select the lines they highlight. DO NOT select the horizontal center line. Be careful to
select ALL of the lines in your sketch (in blue below) so that, when they are mirrored, they form a CLOSED
PROFILE.
Step 11
Step 12. – After all of the sketch lines have been selected (highlighted), (L) click on the Mirror line button
and select the horizontal line (highlighted in red below). (L) click on Apply to complete the mirror image,
then click on Done to end the Mirror command.
Step 12
Step 13. – (L) click on the 2D Sketch Panel and switch to the Part Features panel. Then (L) click on
Extrude to open the Extrude dialog box.
Step 13
- Xem thêm -

